Saturday, December 24, 2011

In which it is Christmas

Merry Christmas from everyone at the Orange Kitty Workshop! We will return to our irregularly scheduled blogging within the next week! 


Wednesday, December 7, 2011

In which things go GUSH GUSH: A Birth Story, Part One

I don't know what it is, but I love reading people's birth stories. Maybe it's because everyone has a completely different experience, yet the outcome is the same: A cute little baby amid a torrent of various body fluids after so many hours of ridiculous pain. Anyway, here is the first part of my birth story and I'll try to keep the details about my various body fluids to a minimum.

So, the Thursday before I went into labor, I woke up at 5am to pee. Nothing new there, being 38 weeks pregnant and all. I rolled over to get up and OH HOLY CRAP the abdominal pain was incredible. I stayed half-slumped over the bed, feet on the floor, not sure if I should continue standing up or yell across the bed at my husband to wake up. But my bladder screamed, "HELLO, IT'S PEE TIME NOW NOW NOW" and I managed to quickly waddle across the apartment to the bathroom with no accidents happening.

I had quit work at 37 weeks because of bad pelvic pain. This was way worse and I wondered if I was in labor, but it was a super constant pain, not pain that came and went like I figured contractions would. I have a fairly high pain tolerance, so the thought that this might just be the beginning and I had somewhere between 12 and 24 hours of labor to go sent me into a ceiling-staring panic coma until my husband, R, woke up a couple of hours later.

R: Morning, honey.
Me: I'M IN TERRIBLE PELVIC PAIN
R: Oh god where is the hospital bag should we go to the birth center now?
Me: ............Nah, I don't think it's labor.
R: THEN WHY

I had thought the baby had "dropped" (that is, moved further down in my pelvis in preparation for birth) a few days earlier because I could suddenly breathe much better and my tummy sagged lower. But NOW she had really dropped, and the terrible pain was her head chilling out as low as possible without me being in labor. Thanks, baby. I spent the next couple of days in bed with my Kindle, with my husband bringing me meals (woot!), and by Sunday morning I felt well enough to be up and at my computer and got my own breakfast while my husband headed off to work.

At this point, I assumed labor was "near," but I wasn't sure how "near." Both my husband and I had a feeling that the baby would come early, but now we were only 4 days away from her due date and I was beginning to doubt she'd be early and figured she'd be two weeks late, just to piss me off and prove my instincts wrong. Around 2:30pm, I yanked out a half-square triangle quilt in progress, sat down at my computer, and plugged my camera battery into its charger for some super happy quilt progress picture time.

And then there it was again, the familiar pregnant urge to pee. Now, every single website and pregnancy book out there had a little passage about water breaking, and they all said pretty much the same thing as this article from whattoexpect.com:

"Only a very small percentage of women experience the rupture of the amniotic sac before they go into labor, so chances are good you'll have plenty of warning (or that you'll already be in the hospital). If your water does break in public, it probably won't come as an embarrassing flood but rather a slow trickle (or a small gush) of colorless and odorless amniotic fluid. "

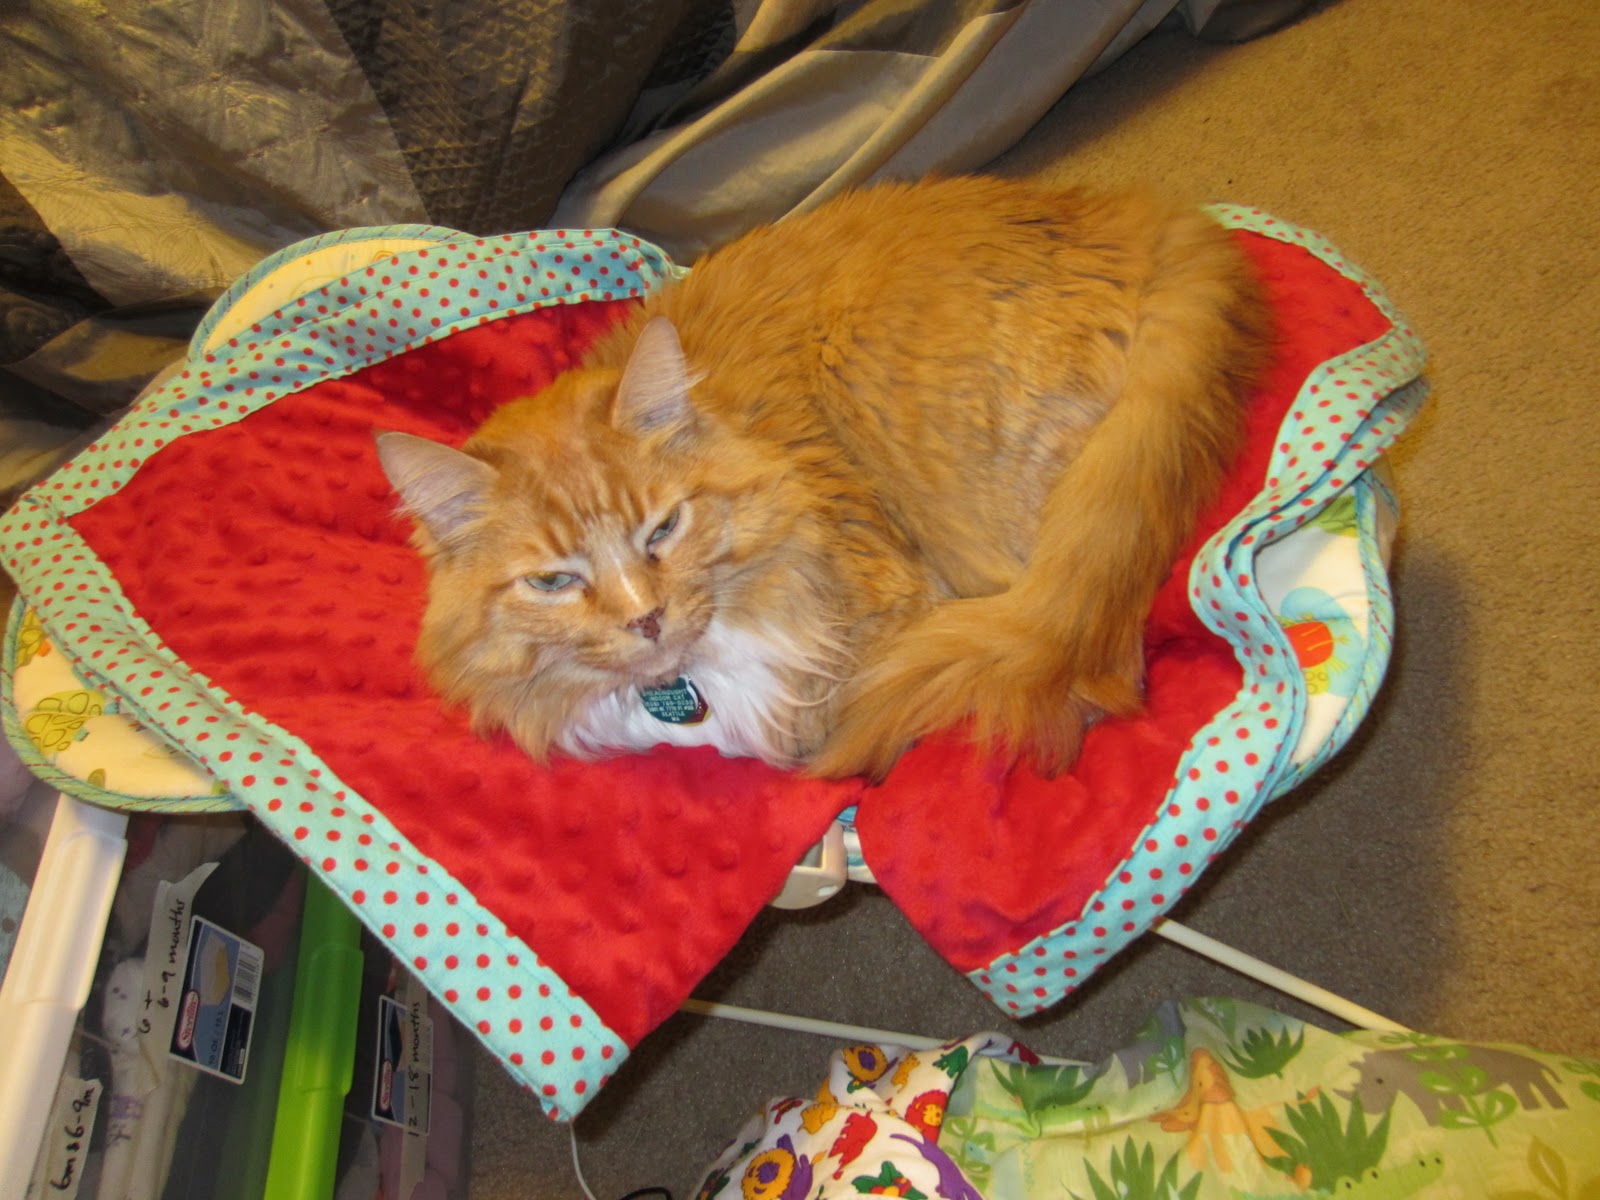
So I was completely unprepared for raising my butt an inch off my chair and having a huge GUSH of fluid suddenly blow up all over my pants, my robe, my legs, my chair, and the carpet. The lazy cats glanced up from their nap and blinked confusingly at me as I waddle-ran past them, screaming, "Oh no oh no what the hell, those FREAKING LIARS IT IS GUSHING EVERYWHERE."

In the bathroom I sat on the toilet, panicking and cursing every single pregnancy book and blog out there for lying to me. After a moment I crammed some towels between my legs and hobbled back to my desk to call the birth center. Somehow they managed to decipher my babbles of "Water broke GUSH GUSH yes I'm Natalie GBS-positive HELP" and calmly instructed me to come in within the next hour or so to get my IV antibiotics started due to me being Group B Strep+. I thanked them, slammed the phone down, then immediately picked it up again and dialed my husband at work.

R: Hello, Interlibary Loan Department, this is R spe-
Me: YEAH YOU NEED TO COME HOME NOW
R: .....Um, ok???
Me: MY WATER BROKE AND WE HAVE TO GO IN NOW
R: ..............!!! All right, I'll be back shortl-
Me: THANKS *slams down phone*

After hanging up on R, as I started wildly throwing last-minute necessities into my hospital bag, like my Nintendo DS and a canister of mixed nuts, a contraction hit me. It was unmistakable. Things were getting real.

R rushed home and, having not taken his lunch break, crammed half a rotisserie chicken down his throat as I continued to toss completely useless things into my hospital bag. I dumped about half a bag of cat food on the floor for the cats, not knowing entirely how long we'd be gone (they were very happy about this). As I started to head out the door, I paused for a moment; there was a thought deep in my mind that I simply could not put into words: "This is it. When you come back to this apartment, it will be with a baby. YOUR baby." I didn't let myself think it, but it was there. I knew my life was about to change tremendously, and I simply couldn't quite handle thinking about it at the moment. Also, my contractions were getting stronger, and feeling biting pain down near your nether regions kind of distracts you from momentary deep, philosophical tangents. We closed the door to the sounds of cats happily munching and headed down the hallway.

To be continued in, unsurprisingly, part two...


Tuesday, December 6, 2011

In which I am STILL STILL a small blog

Right, so I know it's already the 6th, but I'm jumping in on the small blog meet again. I have a feeling I'm going to be 6 days late on EVERYTHING for a while.

If you're a new reader, welcome to the Orange Kitty Workshop. Sewing things are kind of on hiatus right now as I'm the proud and tired new mother of a two-week old baby and two jealous but lazy cats. Bear with me and the OMG BABY posts for a while, though I hope to get some more sewing-project posts up somewhat soon. Really, the Orange Kitty Workshop isn't just about quilts, it's about EVERYTHING. Life itself is kind of a workshop, no?

Sunday, December 4, 2011

In which I remember to post on my blog after two weeks of craziness

Finally, things have calmed down a bit. Honestly, it's kind of like I stepped into an alternate dimension two weeks ago, and I just stepped back out, and I'm not sure how to get back to "normal" life plus Baby. We've had a super steady stream of family visiting and helping out since the baby was born, but now it's just the three of us, alone, and it's weird. It'll be even weirder when my husband goes back to work next week and it's just me and the baby. I've always dreamed of being able to stay home, but at the same time, I've held some sort of job nonstop since I was 18 and in college, so now it's strange to suddenly not have a daily schedule to adhere to. I don't NEED to be anywhere by 7 or 8am, I don't have to eat lunch between 1 and 2pm, and I don't need to make a list of groceries to buy for dinner on the way home from work. I am sure the comfort of adhering to a schedule not made by yourself comes back into play when kids are school-aged, and you HAVE to get them to school by a certain time in the morning and whatnot, but when it's just me and a newborn at home--there is no set schedule. I COULD try to make up something like, "Ok, I'll wake up at 8 and we'll take a walk at 10 and eat at 12" but that doesn't really fly with a two-week-old who may be screaming at 8 and dead asleep at 10 and damn if I'm going to wake her up just so we can walk around the block because my schedule told me to.

Basically this whole thing is a huge learning experience and the good thing is that I should have tons of time to sew when the baby is asleep (if I am not napping as well), so more "workshop" related posts should come soon. I mean, honest to (insert deity here), the day my water broke and I went into labor, I had laid out an unfinished quit on my bed and was preparing to take pictures with my new camera and write up a post about my progress. But then my water blew up all over my desk chair as I was at my computer and less than 12 hours later, I had a baby in my arms.

And in case you were wondering, Orange Kitty has no idea what the hell a baby is and mostly curiously keeps his distance. However, after a week of observing us taking nonstop pictures of her in her little bouncy chair, he decided to try to get in on the action. I think we have a jealous cat.

If I sit in here, you'll take pictures of me for people to coo over, right?!


Monday, November 21, 2011

In which I become a Mom

So I was going to post about my new camera and how much I like it compared to other ones, and maybe talk about one of my quilts in progress. But I had a baby, so you can have a picture of her instead--taken with my new camera, of course. You don't mind, right?

Elena "Elly" Magdalene
11/21/11 2:12am
I'll probably post a bit of birth story once we are discharged from the birth center and go home. Is it any surprise that I'm anxious to see how Orange Kitty reacts to a baby?!

Monday, November 14, 2011

In which I talk about cameras, not quilts or sewing or kitties

I am sure some of you have noticed that the pictures on this blog are...well, subpar. While I certainly make no claims about my photography skills, I must put some of the blame on my camera. I've been using a 7 year old Kodak EasyShare that I cannot stand to take all my pictures. It's old enough to be a digital camera with an actual little viewfinder still on it, and the digital screen on it is TINY! It takes 5 seconds from turning it on for it to be ready to snap a picture, and it's fat and clunky and the flash isn't very strong anymore. The only good thing I can say about it is that, for being a 7 year old camera, it still works!

I had a more modern Samsung digital camera that I liked a lot, but it died back in, oh, January? And I just never got around to replacing it because the old Kodak one worked "well enough." However, this weekend it finally occurred to me that, "Hey, we have a baby due in less than two weeks. Maybe THIS is a good excuse to finally get a new camera?" After consulting my younger brother (who is a great photographer--you can check out some of his stuff at Classically Geeky), I ordered a Canon ELPH 300. As much as I'd love a $500 camera, I just can't afford it right now, but since the only things I ever take pictures of are cats and quilts (and soon to be baby), I don't need anything TOO fancy. Anyway, the whole point is that I'm getting a new camera and I'm excited because who doesn't like new stuff? Later this week I'll post some pictures and then we'll see if it WAS the 7 year old camera making my pics kind of subpar, or if I really am just a crap photographer!

Tuesday, November 8, 2011

In which I become a Stay-At-Home-Mom without actually being a mom yet

Shortly after my last post, I decided I was done, done, done with the working-for-pay world (at least, for the remainder of my pregnancy). So I told my boss I'd stop working the next Friday (coincidentally, pay day, so I got to pick up my paycheck...), told the preschoolers to ask someone else to tie their shoes, celebrated at the thought of not having to spend my mornings outside in 38 degree weather anymore, and was DONE.

After a weekend of visitors, I found myself with actual free time yesterday morning. It was bizarre, as even when I would normally take vacation time, I'd usually be busy travelling or at least preparing to travel or whatever. I was always doing SOMETHING. At the moment I am literally sitting at home waiting to go into labor, which may happen tonight, or three weeks from now. Other than "pack and repack hospital bag, wash dishes, pet kitty," what else is there to do?

SEW, of course. The sewing machine had sat silent and idle for at least two weeks, as I just haven't had the time or energy to work on any sort of sewing project. Yesterday I flipped it on, loaded up some thread, and mused over what I wanted to do. I didn't feel like working on a quilt since I wasn't fully back into "sewing mode" yet, so I pulled out a bunch of cheap, slightly used Gerber prefold diapers that we were planning to use as burp cloths, yanked out some scraps, and sewed away.

Yeah, the dinosaur love shows up even on a cloth meant to be puked on. 

There are a bunch of tutorials on how to embellish burp cloths out there, but I didn't follow any particular one. I just grabbed some scraps and ric-rac and sewed away. I even used the opportunity to practice my binding skills (which could always use some work) on one of the cloths. I like how they turned out and I'll probably spice up a couple more this week. Or, knowing me, go totally overboard and make like 50 burp cloths, which probably won't actually be a problem since I'm sure we'll have the spit-uppiest kid ever. Anyway, I'll probably be sewing a lot now that I have the time, so look forward to more updates, which will probably get more and more insane as my pregnancy progresses towards my due date with no sign of labor in sight. Can one induce labor by sewing too much?

At the upper left: a couple of store-bought baby legwarmers, and a bunch sewed by my mom! This baby is going to be spoiled by handmade things! 


Thursday, October 27, 2011

In which I talk about an old project because I've been way too lazy lately to make anything new

So I'm not dead, nor do I have a baby yet. I've just been exhausted--even though I work part-time, my job requires me to stand outside most of the morning chasing after preschoolers, and the standing + cold Seattle rain + being asked to tie shoes, because being 36 weeks pregnant apparently triggers the "Oh, let's ask the teacher with a belly as big as a watermelon and stinging pelvic pain to BEND DOWN and tie our shoes every five minutes!" logic in 4 year olds, has completely wiped me out this week. Usually when I stay home sick or something, I'm able to relax and use an hour or two to sew, but this week I've mostly been stuffing my face, then stuffing my face with Tums, then curling up beneath an electric blanket to "read," which tends to result in me taking several-hour naps. And the whole time, Baby Orange Kitty is happily kicking away at my ribs like she's practicing to be a jackhammer when she grows up and showing no signs of coming early. I mean, I know the longer she's in there, the better, but man, it'd be nice to finally have a baby in my arms that reassures me that all the pregnancy pains + puking + etc. weren't for nothing.

One thing I did do lately that was sewing-related was fix up a small wall hanging I'd forgotten about. Well, not really "forgotten"--it's been hanging in my bathroom, but I just kind of ignored it every time I walked in there since I wasn't happy with it. I'd made it to practice the hourglass block, and it was also the first thing I completely finished quilting and binding. So why didn't I like it?


Well, first of all, it's not terrible, considering I made this when I still barely knew anything about quilting. I liked how the design came out and considering I had no idea how to bind, the binding came out all right too.  Also, I had no walking foot--I didn't know what one was--so yes, the grid quilting was done with just a normal multipurpose foot that came with my machine, hence why it looks like I was tackling quilting after having a couple shots of bourbon. Even then, it wasn't really the wobbliness that bugged me--it was that I quilted using plain white thread and the diamonds were way too small. The quilting completely overtakes the rest of the design, in my opinion. If I had used a darker thread OR a larger grid, I would have been happier, I think. Or I could've just kicked back some more bourbon and then I REALLY wouldn't care what it looked like, but I'm thinking that's not really the best way to fix a quilting goof. A fun way, perhaps, but not the best way.

So in lieu of sewing (if someone can figure out a way to setup a sewing machine + table and supplies in bed, like a breakfast-in-bed tray but way bigger, please tell me), I decided to attempt to make this little wall hanging a little more visually attractive. I sat down with my best friend, the seam ripper, and ripped. And ripped. And thought of all the little brats at work daring to ask the pregnant lady to impossibly bend over to tie their shoes, and ripped some more.


There we go! I think if I were to redo the whole thing, I'd practice some free-motion quilting on it instead, but I think the grid quilting is large enough now that it doesn't immediately detract from the design as a whole. It's definitely not perfect but it WAS one of the first quilting projects I ever did. It's nice to compare it to more recent projects and see how I've improved over time. I'd love to see other people post about projects they completed when they first started quilting and how far they've come since then!


Friday, October 14, 2011

Free Motion Friday #2: In which I do somewhat better than last week

Last week's Shadow Waves didn't go over so well. So, confession: While I was reading through everyone else's entries from last week, I noticed a few people mentioned "Oh, I forgot to set my stitch length to 0, but once I did, things were a lot easier!" And in my arrogant mind I'm like, "Ha ha, who doesn't check their stitch length before starting to sew?" I hadn't touched my sewing machine since the horrible Shadow Waves attempt, so I sat down at my sewing machine the next day and noticed...

Yeah, my stitch length was set to 3. WHOOPS. Talk about eating humble pie (or humble sugar-free cheesecake, in my case, anyway) or whatever. So I set my stitch length to 0, bit my lip, and attempted Drop Art.

I apologize for the poor quality photo, but my inlaws are coming to visit tonight and "OMG need to clean NOW" takes precedence over "Carefully toggle color and brightness balance in Photoshop for small blog picture that is orange like all the kitty hair I need to vacuum up!"

Hey, it looks a lot better this week! I was able to keep a more constant stitch length and somehow making drops was easier than making wiggly lines. It's still obvious where I wobbled a bit, and it was way harder to make the bottom teardrops than the top, but overall, an improvement from last week. One thing I just can't get down is following the edge of my square when going from one teardrop to the next--I cannot freaking sew directly on top of that stupid line, no matter how hard I try, so it's all wiggly and stuff. I guess on patterned fabric it wouldn't really show up, but it bugs me when I can see it so well on my solids. And yeah, I totally misjudged the size of my last teardrop, so that's why there's a huge gap on the left. Oh well. Practice, right?

Friday, October 7, 2011

Free Motion Friday #1: In which I discover I really, really suck at free motion quilting

I've joined up with Cindy's Free Motion Friday, where every week she posts a new free motion quilting design from the Free Motion Quilting Project. Then anyone who wants can practice the design all week and post their results every Friday. Since I've been wanting to do more than grids and stippling, I thought this would be great.

And this week was great in that I sat down at my machine and practiced. What wasn't great were my results. First off I wasn't sure what to practice on. I have TONS of scraps, but since I'm also working on three scrap quilts right now, I didn't want to use up all my large scraps on quilting practice. I found some white knit fabric shoved in the back of my closet and did my first attempt on that, but it was terrible because the knit fabric was stretchy and pulled too much while I was trying to guide my fabric. I guess the design came out all right for a first try, but you can see my stitch length is all over the place and the fabric went from being a square to being a....not-square.


It looks like my sewing machine had a seizure on the left side of the block...

At the bottom of one of my scrap Rubbermaid tubs, I found some really cheap white solid cotton so I spray-basted that to some scrap flannel (just for bulk) and tried again. This time, guiding the fabric through my machine was MUCH easier, though my hands slipped a lot more than usual--I always thought quilting gloves sounded stupid, but now I see how they could be helpful. My stitch length is far more even, but the design....eh. The first couple of lines on the left are actually pretty nice, but then I got impatient or something and the rest are kind of pointy and jerky.  It's less "Shadow Waves" and more "Shadow Someone-Threw-A-Freaking-Boulder-Into-The-Ocean-Waves."


I think the more embarrassing things here are the guacamole stains on the right. Please ignore my gluttony.

I think the best part of this whole experience was the fact that I used crappy polyester thread wound on a crappy nicked spool. There is nothing better than being already frustrated with your sewing when suddenly the thread catches on the crappy broken spool and your entire spool of thread goes FLYING off your sewing machine WHILE YOU ARE STILL SEWING and sails across the room into the middle of a sleeping kitty pile, scaring the everliving crap out of everyone. Only MY crappy thread would be strong enough to catapult itself off my sewing machine instead of just breaking like normal crappy thread would. 


Tune in next Free Motion Friday for the Drop Art pattern! I have a feeling this will be even worse...

Sunday, October 2, 2011

In which I am still a small blog

Since I am still a small blog, I'm linking up with the Small Blog Meet Up over at Lily's Quilts again. Hello to those of you finding this blog through there! You can read last month's intro post here, because I don't see the point in typing it out all over again. I hope you find something amusing to read here as I cuddle my orange kitty and freak out over the last few weeks of my pregnancy. My very first tutorial is up today (post below this one), and there will likely be a small giveaway towards the end of this month. Hurrah! These are exciting times at the Orange Kitty Workshop! (Or at least, I'm easily excited, okay?)

Easy Flower Pincushion Tutorial

Welcome to the first Orange Kitty Tutorial! This is an easy pincushion I can whip up in about 40 minutes, which means you can probably do it in 30 or less because I'm a bit slow when it comes to the hand-sewing.

Materials you will need:
Some felt
Some fabric
Embroidery Thread
Small button for pincushion center
Small decorative insect button (optional)
Fiberfill for stuffing
Chopstick, stuffing fork, etc.
Pins


Top: A finished pincushion, a decorative dragonfly button, and a green button for the center that I got in last month's goodie swap! Bottom row: Purple felt, white and green cotton fabric, and a mess of embroidery thread--I'm sure yours is less tangled than mine. Not pictured are the fiberfill and chopstick, because I totally forgot I needed them until I got to that point in the tutorial. 


Step One: 
Cut your felt and fabric into same-size circles. You can make a huge pincushion or a really tiny one, whatever will work for you! My circles are about 5" in diameter, traced from a Pyrex lid, and my finished pincushion is roughly 3 1/2" in diameter, which I find is the perfect size for me.


I didn't show the uncut squares of felt or cotton fabric because I'm pretty sure you already know what they would look like. If you don't, then this tutorial is probably too advanced for you, and what are you doing on a sewing blog, anyway? 


Step Two:
Place your cotton fabric face down on the felt. Pin together, then sew about a 1/4" from the edge--backstitch at the beginning and the end! Make sure to leave a gap of about 2" so you can turn it inside out.


Pin the circles together...


...then sew! The thread hanging off the circles is where I began sewing, and the sewing machine needle's placement is where I stopped. This leaves a nice gap to turn it inside out in the next step.

Step 3:
Turn the pincushion inside out. I find a chopstick works well for this. Don't jam it too hard into the pincushion or you might rip right through the fabric (not like I'm, um, speaking from experience here or anything...). If you don't have a chopstick, you can use a dull pencil or small dowel, or take a break to go out for some Chinese food and grab an extra set of chopsticks while you're there.


I fully advocate taking a break ten minutes into a project to pick up some tasty Chicken Katsu or General Tso's Chicken. 


Once you've turned it, start cramming fiberfill into it! The more stuffing you stuff it with, the fluffier your flower will be, but the harder it'll be to sew the embroidery thread on in the next few steps. However, if you plan on using your pincushion for really long pins, you'll probably want to stuff the pincushion quite a bit, otherwise you may end up sticking a pin into the cushion and having it go straight through the bottom and jam into the table/cutting mat/hand/etc.

Stuff that sucker well! 


Step Four: 

Stitch closed the stuffing hole. I didn't take pictures of this because I'm still mastering it myself, but I used a ladder stitch tutorial from here. It's not hard, nor does it take long, my hand-stitching just still sucks!

Step Five:

Measure out your embroidery thread. I find that wrapping the thread loosely around the pincushion five times gives me just enough thread to sew and have a little left over to attach the button at the end. Use whatever color you want or have on hand.


Wrap the thread loosely around the pincushion to measure it out. Hey, Benta's autumn mug rug from last month's goodie swap is being put to good use! Too bad my coffee mugs didn't get the memo that it's only autumn, and nowhere close to snow weather yet...


Step Six:
Knot one end of your thread. Using an embroidery needle, find the approximate center of the felt side of your pincushion and draw the needle through to the front. If you have a super stuffed cushion and a really short needle, this may be tough, but you can make it work by squishing the cushion down as much as possible (or just getting a longer needle.)


Jam that needle into the center of the back of the cushion. It doesn't need to be exactly in the center because no one will notice. Also, apparently I got distracted halfway through making this tutorial because I'm not sure how we ended up finishing this pincushion at my desk instead of at the sewing table in the other room, where we started. Oh well! 


Make sure when the thread comes out the top, it's also approximately in the center, unless you really like the lopsided flower look. 


Step Seven:
Once you pull the thread through the top of your pincushion, wrap it back around and draw it through the center of the felt again, pulling as tightly as possible. You now have half a "line" going down the middle of your pincushion. Wrap the thread around through the back again and repeat for as many "petals" as you want on your cushion. I ended up with eight petals total, so I repeated this step seven more times after the first.

Wrap the thread around and stick the needle up through the center back again, so you have something that looks like this.  


Pull tight, so the thread sort of "cuts" into the side of the pincushion. The tighter you pull, the more pronounced and fluffy the petals will be at the end. Now you are going to wrap that thread around and bring the needle up through the center back again. 


...Like this. Then keep going to make more "petals" for the flower, pulling the thread tight each time. Here I've wrapped the thread around three times and made two petals.  


Step Eight:
To add your decorative insect button, just thread the embroidery thread through the insect button's hole at any point you'd like and pull tightly.

No need to tack it down or anything--as long as you're using all six strands of embroidery thread and you are pulling tightly, the button will stay in place! 


Step Nine:
Once you have your petals completed and your insect button attached, it's time to add the center button! Thread the needle through the button and center the button in the middle of the pincushion, pulling tightly, as always. Sew a couple of stitches through the button to attach it, then knot your thread and trim the excess. You're done!

Ready for the center button! I think it's easiest to use a button with only two holes in it to attach--if you use a button with four holes, you will need to cut your embroidery thread a bit longer at the beginning. 

Just slide the button along the embroidery thread....


...And make a couple of stitches through the button's holes to tack it down.  Knot the thread on the felt side of the pincushion and cut off the excess. You're done! 


All done and ready for pins! 


I hope you enjoyed the very first Orange Kitty Tutorial! If anything is unclear, please let me know--Step Seven is really hard to explain in words, but hopefully my pictures help. If you make one, feel free to share in the comments, I'd love to see other variations or improvements you think up!

Wednesday, September 28, 2011

In which I get cool stuff and you get two blog posts

Hey all! You guys get TWO new posts today because I was dumb and wrote a post a few days ago and hit "save" instead of "publish." Isn't this the opposite problem most bloggers have? Sunday's post should be below this one, so go ahead and read that one first if you want.

Anyway, both my swap goodies came in this week and THANK YOU SO MUCH, SWAP PARTNERS! I am actually pleasantly surprised and touched that you both took my incoming baby into account and made stuff for her, too--I genuinely wasn't expecting that since my blog is more about self-centered me than about the kid. Jennifer at Knotted Thread made an ADORABLE mug rug that features both my kitties on it--how cute is that?! And Benta at SLIKStitches' autumn-themed rug came just in time for me to start my fall decorating since I love autumn so much. The scissor tags are perfect too, since lately my scissors keep disappearing from my sewing pile (yeah I don't have a dedicated sewing table). Now I can point to the tag and say, "SEE, MY NAME REALLY IS ON THEM!"


Jennifer's goodies on the left, Benta's on the right. Why yes, that's the back of my Fall blocks quilt, which has not yet made it onto a wall due to being stolen and slept on by a certain orange kitty.  Oh, and Jennifer also sent a small container of green buttons that I forgot to take a picture of...

I really enjoyed this goodie swap. I wish I'd had little more time to complete what I wanted to for my swappees, but it is what it is. Right when I was getting back into "sewing mode," real life took over and got in the way and unfortunately "Sewing Goodies For Internet Strangers, Which Is Far More Fun Than It May Sound" gets pushed further down the list, behind things like "I Need To Reapply Thermal Compound To My Computer's Heat Sink Because It Keeps Overheating, Oh No Now The Computer Is Crashing Every Time It Comes Out Of Hibernation Mode, WHY" and "I Just Filled My Car Tires With Air Two Weeks Ago, Why Is One Going Flat Again Already?!" and so on. I really admire those of you who seem to have it all together and manage to balance kids, work, hobbies, and everything else.

Now for more action shots of my goodies:


Yeah, this is my "sewing pile," otherwise known as the dining table, which is really just a card table shoved next to a wall by the kitchen (I miss living in a house). Um, I usually don't use my tomato pincushion upside down, so ignore that. I am very happy that my scissors are labeled, without that label being some squished lettering in Sharpie on an ugly piece of masking tape. This is a great idea!


So my cats are enticed way more by treats than they are by water, and I would have been mauled to death had I tried to intertwine their tails together, but here is the closest I could get to making them imitate Jennifer's mug rug. I also think this is Gray Kitty's pictorial debut on this blog--construction is being done on our apartment building and Gray Kitty spends most of his time cowering under my husband's desk, terrified that all the Scary Noises coming from outside are going to invade and steal his cat tuna or something. Orange Kitty couldn't care less.


Proof that taking pictures of cats is a several minute, multiple-try endeavor.

Thanks again to my swap partners! See you around the blogosphere (or whatever they call it these days).

In which I totally meant to post this Sunday, but didn't, so you get it on Wednesday instead

It's Sunday and I finally have time to myself to get things done, like surfing the internet and not cleaning and forgetting that the laundry has been waiting to go in the dryer for the last hour. It is a very productive day, you see.

The most exciting thing that's happened in the last week or so is that we got a new ironing board. I know, it's THRILLING. Our old ironing board we bought cheap, as we had just graduated from college and had no money, and it ended up sagging in the middle. The "board" part was plastic and so over time I guess the plastic melted and warped and there ended up being a fairly nice deep trench all through the center length of the ironing board. Why yes, that means EVERYTHING you've seen me make on this blog was pressed or ironed on a board that wasn't even close to being flat, which is as much a pain in the butt as it sounds like. Honestly, I hate to be all "IT WAS THE IRONING BOARD'S FAULT" but I swear half my mismatched seams and stuff were because I was pressing fabric at an angle, or in a trench. Anyway, the new ironing board wasn't exactly expensive either, but it's metal and much sturdier than our old one, so yay!


New ironing board action at an...uh, let's call it "artistic" angle. Yeah. 

And with the new ironing board I finished my mug rugs for the goodie swap. It took me way too long to do these because of how intimidated I got looking at everyone else's work on the flickr page. "Ahh, why do they have to be so awesome and complicated?!" I asked myself, and then finally it hit me: "Yeah, why DO they have to be so complicated?" It didn't help that my swappers both listed a bunch of colors and fabric that they did/didn't like and I was going crazy digging through my stash to find tons of fabrics. I totally respect those people who were able to make really neat designs and hand-quilt and stuff, but realizing that wouldn't work for ME and would just stress me out more was what allowed me to relax and get back into "sewing mode."

Both mug rugs ended up only having two fabrics (plus the binding, so three, really, I guess). I think it really ends up working, I mean, the colorful fabrics I think are colorful enough that the first thought that goes through your mind isn't "Gee, she only used TWO FABRICS, how lazy." I'm an hourglass block fan, so I used that for the "pinwheel." Neither mug rug is totally perfect but overall I'm really happy with how they turned out and I hope my swap partners like them.

I spy a bee button...!

The goodies are really easy pincushions. I had to put to use the bee buttons I got distracted by a while ago, and this seemed like a good use! A dragonfly snuck in there for one partner, too. I liked these enough that I made myself one as well. If I join another goodie swap I'll probably make more of these; they are quite fun.


Of course I had to keep a bee pincushion for myself! This was the first one made so it's not as fluffily stuffed as the ones that my swap partners are getting. 

Monday, September 19, 2011

In which I have not totally vanished

Oh wow, it's been a while since I last blogged. Sorry, folks, I'm not dead. Partial laziness, partial pregnancy exhaustion, I suppose. I'll have a proper update in the next couple of days, but for now, I shall allow Orange Kitty to explain how I feel: 


Thursday, September 8, 2011

In which "pregnancy brain" wins again

I spend way too much time at the fabric store. Part of the reason for this is sheer stupidity on my part. Like, yesterday I went in to buy supplies for the mug rug goodie swap and walked around the store for thirty minutes with an index card with the words "embroidery thread, interfacing, fiberfill" scrawled on it. What did I walk out with?

I would say "Ignore my messy sewing space" but the mess just proves that I AM working on stuff, so meh. 
Embroidery thread, interfacing, buttons. Buttons? Well, the button racks are near the cutting table where I got my interfacing cut, and I got totally distracted by the bee buttons, which I thought were adorable because I love bees, too, and then there was a rack of 30% off buttons so I went through those for a while, then paid for everything and left.  In my mind I knew I had three types of items on my list and I left the store with three types of items, so, satisfied, I drove home.

Cue a few hours later after I'd made dinner and sewed for a while, I got to the part of my project that instructed me to start stuffing it, and I looked around and wondered what I was going to stuff it with. My eyes fell on my buttons and OH YEAH, I was WALKING towards the batting section of the store earlier, but never actually reached it because of CUTE BEE BUTTONS. Maybe it wasn't such a bad thing that I forgot my fiberfill, because I set aside my sewing earlier than usual and went to bed before midnight, so I actually got some decent sleep. Still, I felt dumb pulling up to the fabric store for the second day in a row after work today, and forced myself to bypass all the buttons and fabric and go STRAIGHT to the batting section at the back of the store.

Then my pregnancy bladder called, so I ran to the bathroom and got distracted by felt on the way back to the batting section, thus I nearly walked out the door without my fiberfill AGAIN, but by some miracle remembered at the last second, and actually managed to pay for it and bring it home. See? I even took a picture to prove it.


I don't know how some people manage to do like 3 quilt-alongs and 2 fabric/goodie swaps and their own personal projects and raise kids and cook dinner and stuff all at the same time. I mean, I apparently can't even manage to buy what's on the three-item list I'm carrying around the store with me, though I'm sure the fabric store employees get some amusement out of me. They probably refer to me as the absent-minded pregnant girl since a few weeks ago I left my car keys sitting on top of a shelf of autumn fabrics and ran back through the store in a panic after paying for my purchase, retracing my steps to find them. One person's forgetfulness is another person's amusement, I guess!


As a bonus, have an Orange Kitty Story of the Day:  When the cat heard me get out my camera to take a picture, he ran in the room and shoved his face in the lens because he's vain like that. I pushed him out of the way and he apparently went, "Screw this, if you ain't taking a picture of me, you ain't getting a picture of what you want" and shoved his tail directly in my line of sight as I snapped the photo. He is such a brat.

Tuesday, September 6, 2011

In which I intentionally make a baby quilt for someone else


Well, that was a busy weekend. Let me sum it up:

Wednesday Night

Me: Hey, since we can't make it to southern Oregon for Nephew's birthday next week, why don't we just bring him his present this weekend when we drive to your parent's house in Portland?
Husband: Yeah, I was thinking the same thing. But I don't know what to get a 1 year old at all.
Me (busy sewing away on a kitty quilt): Hmmmmm.
Husband: Hmmmmm.
Me (sews for another 10 minutes): OH WAIT I CAN MAKE HIM A QUILT!
Husband (glances uselessly at calendar, which is still set to July): Can you make one by Saturday?


Was that a challenge? Because oh yes, I can! 


And thus, Thursday after work I dashed off to the fabric store and scoured their remnant table for fabric suitable for a 1 year old. I was totally inspired by Amy's On the Road Again quilt, because I love the primary colors she used, which really could be for either gender. I didn't want to use transportation fabric, though, because I have the same issue with CARS ARE FOR BOYS that I do with HORSES ARE FOR GIRLS or whatnot, and also I absolutely love dinosaurs and I wanted to sneak some dinosaur fabric in there because I'm self-serving like that.

Anyway, Thursday night was full of cut cut cut sew sew sew baste baste baste, and then Friday night was full of quilt quilt quilt bind bind bind. Before quilting, I hesitated for several minutes, trying to decide if I wanted to stipple the quilt or do a straight line grid. I like stippling, but in the end I figured a grid pattern would be faster and less hard on my pregnancy-shot wrists, and I finished sometime around midnight.

Woo, look at how nicely most of those corners match up! And it bears repeating that I really LOVE my walking foot. 

I must say, I LOVE THIS QUILT. I wish I could've kept it for myself, because even though the fabric trends towards "boy," I'd totally be thrilled if someone gifted this to me for my baby girl (side note: If anyone recognizes a fabric line in my quilt, feel free to let me know what it is since most of this came off an unmarked fabric table or my stash, and I've GOT to get better with keeping track of what fabrics I use). My piecing has gotten way better--there were still a couple of seams that were off, but far more corners met up than didn't, and that makes me really happy. Also, the binding! The binding!

MY (mostly) BEAUTIFUL BINDING! 

It probably took me twice as long to bind as it should have, but after my last binding failure, I was determined to make this one WORK (especially since it was a gift). I only bound one edge at a time and I wish I had stopped to take a picture because it looked absolutely ridiculous with the amount of pins and clips attached to it. The front was crisp and straight, and the back looked as well as you can expect a machine binding to look. I am stupidly happy with how well it came out and it was totally worth stabbing myself a million times with the millions of pins poking out all over the place. 

My couch is ugly and green. This is not my couch. 

The last part of this quilt I'm proud of is the backing. It's my first pieced backing ever--completely unintentional, because I had figured I had enough red fabric for the back, but after I cut up the red for the binding, there was hardly any left, so I settled on the yellow I used for the border, but surprise! I was barely short of yellow, as well! I had a few squares left over from piecing the front, so I sewed those together and slapped yellow on either side and was pleased with the result. I'm not sure why I was terrified of pieced backings before this--probably because I'm lazy and it seemed like a lot of work--but I like the look and I'll definitely have to do more.

And I think this quilt will look even better once it's been washed a couple more times and gets all crinkly. I didn't have time to wash it between the time I finished it and when we drove to Portland on Saturday, and then my sister-in-law and nephew showed up shortly after we did so I couldn't sneak it into the wash without anyone seeing. Luckily, everyone except my husband and I had left the house on Sunday morning when I woke up, so I ran downstairs, spritzed the quilt with water, and threw it into the dryer for 25 minutes, and had time enough to pull it out and quickly take pictures of it in their living room before everyone came back. It got crinkly enough to look "quilty," but I'm kind of hoping our nephew pukes on it a couple of times so it gets washed a lot. Happy Birthday, nephew, please vomit on my present to you.

Now I kind of want to make a slightly more "girly" dinosaur quilt for our kid, even though I still have the unintentional baby quilt to finish. I like primary and fall colors a lot though, so "girly" for me would be throwing in a couple of purple squares or something. I have a ton of other things to work on right now though (hello, mug rug goodie swap, hey look it's already September 6th and I haven't sewn anything for it yet even though I have a million ideas in my head), so we'll see. There's always time AFTER the baby is born, right? (Already-Parents: Go ahead and laugh at my naivety. Or tell me "Oh yeah, the baby will sleep 20 hours a day like a cat and you will have tons of free time on your hands." That'd be cool., too.)


Uh, the top isn't actually as uneven as it looks in this picture. It's straight, I swear. 


Saturday, September 3, 2011

In which this preview is approved for all ages

Wow, thanks to everyone who found my blog thanks to the Small Blog Meet Up--I haven't had a chance to respond to everyone's comments, so don't think I flippantly dismissed you and your blog as unworthy of my regal attention, like my cats regularly dismiss me, if I didn't get back to you yet. I'm pregnant, ok? (A co-worker told me today that I don't use that excuse enough, so I'm using it now, even though I'm really just lazy.)


Actually, one of the reasons I haven't had time to reply is because I've been working on another last-minute project that I promise will get its own entry within the next couple of days, but for now, here's a preview:


And with that, I'm out for the weekend. Hooray for three day weekends and barbecues!

Thursday, September 1, 2011

In which I am a small blog

It's Fresh Sewing and Small Blog Meet-Up day over at Lily's Quilts again, and this time I can jump on the link train! I may post something for Fresh Sewing Day when I get back from work, but for now here's my Small Blog intro:

Hi, I'm Natalie. I've always loved crafty stuff--I was a graphic design major, but my strengths have always been in working with my hands, not creating things on a computer, so I wish I'd done more crafty things like painting and pottery in college. No matter, I'm making it up now by learning to quilt and sew! I currently live in Seattle with my husband, two cats, and an active little girl kicking around wildly in my uterus. This blogging/quilting/mom thing is completely new to me--I can build a computer from scratch in two hours, but it took me thirty minutes to figure out how to assemble a 6-piece baby bouncer, and then I managed to assemble part of it upside down--so I hope you find some amusement as I blog about figuring all this stuff out.

Monday, August 29, 2011

In which I add another thing to my "To Do" list

I saw this over at Missy Mac Creations and love the idea--who doesn't like getting random gifts in the mail throughout the year? So, here we go:

Rules:

1.  I will make a little something for the first 3 people that comment on this post.  It will be a surprise and may arrive at any time in the next 365 days (yes, a year).

2.  To sign up to receive a gift from me you must play along too.  Share the giving love on your blog by promising to send a handmade goodie to the first three people that comment on your blog post.

3.  You must have a blog.

4. After commenting on my post, you have to post this (or similar) on your blog to spread the love.

I don't know if three people will even get around to commenting on this, but I will say that if you find this post 6 months from now and only 2 people have bothered to comment, you can still be commenter #3 and get a random goodie from me! When you comment, I'll email you and get your address and then you should get something from me sometime before next August. Woo! 

Sunday, August 28, 2011

In which pregnancy hormones take over all sense of logic and time

Even though it's still August, I suddenly needed to make an autumn fall hanging. Like, now. I don't know if this is a result of pregnancy hormones making me "nest" since I'm now in my third trimester, or if I'm just nuts, but I stopped working on all my other projects and sat down on Friday afternoon to finish rapidly churn out my autumn quilt.


You know, I was really disappointed with how much of this came out. I love the pattern and I love the fabrics, but I'm not sure if it's because I was rushing because Oh Crap It's Going To Be Autumn In A Month And By God, My Kid Needs to Have An Autumn Quilt On The Wall Before She Is Born In November.

This was my first time using spray basting. I read that you didn't have to use a lot, but I don't think I used enough--the fabric still moved around and puckered a bit, though far less than I expected it to. It's most obvious in the upper right corner--actually, before binding, the top edge was quite warped and I almost cried since I figured the only way to fix it was to rip out all the quilting and smooth out the fabric again. Luckily, some creative trimming and the binding completely hides the warped edge.

This is really the only spot you can see where my nice straight seams curved on me during quilting. Boooooo!  At least, overall it's not TOO obvious...

Second, the quilt doesn't lie flat. I have no idea how that happened since the puckering really isn't that bad at all. This would bother me far less if it wasn't going to hang on the wall, though I think, again, with some creative use of tacks and such, it will end up being pretty flat on the wall. It's still annoying since I am assuming this all stems from the batting and quilt top not being completely flat during basting, which I actually spent a lot of time on. 

Gaps in the green binding. You can see where it just suddenly decided not to be sewn down and the batting pokes right through. Also, a certain orange kitty tried really hard to be part of this picture. 


And then there's the binding. From the front, it looks fine. The back looks HORRIBLE. I've had this problem with every quilt I've bound so far and I'm not sure how to fix it. The binding on the back likes to curve up as I sew from the front, and then I end up with whole bits of binding that completely missed being sewn, as you can see in my picture. I use both pins and clips to keep the binding down, so I'm thinking that the fabric is flipping up as I remove the pins and clips while sewing, and then of course I don't notice since I'm machine binding from the front and can't see the back binding getting all flippy. Do I need more pins? More clips? Different pins? I'll have to experiment and see. 

Now that I've spent half a post complaining, what did I LIKE about this quilt? Well, like I said before, I love the fabric and the easy pattern. I had begun quilting with white thread, but a few minutes into it, stopped and ripped out every stitch, then hopped in my car and drove to the fabric store. I initially meant to buy cream colored thread to quilt, but my eyes fell on a mid-tone brown and I wondered if that would work better, so I bought that instead. I am SO happy I went with the brown--it was my first time quilting with anything but white thread and I think it really complemented the fabric colors, rather than overtaking them, like I felt the white was doing. This was also my first time free-motion quilting something larger than a kitty block, and overall I do like how it turned out. I quilted it all in one three-hour stretch, after which I realized that it was 1am, my wrists were screaming in pain, and the faint smell of burned rubber was coming from my sewing machine, but I'm happy, overall, with my quilt--just disappointed that I didn't catch fixable problems until it was too late to fix them. Which may have been related to me dead-set on finishing the quilt immediately, even if it was 1am, because my unborn baby needs an autumn wall decoration in August, logic be damned!

The GOTTA MAKE NOW quilt sitting in the first baby gift we received this weekend...little baby girl, the pain over this autumn quilt was all for you. Also, Orange Kitty literally has to stick his butt in every picture possible. 

And anyway, I rationalize that the only way to overcome my disappointment and get better at quilting is to make more quilts. So everyone wins! (except maybe my bank account...)

Wednesday, August 24, 2011

In which string quilting begins to slowly take over my bedroom floor

I initially bought all those scraps off of etsy to help out with my postage stamp quilt. Obviously, I ended up with WAY more fabric than I was really expecting, so I began to work on a string quilt as well. The string quilt has very quickly taken over my sewing life. It goes fast--a single block takes me about 10 minutes to sew, assuming I don't get sidetracked by running out of bobbin thread or having a cat step on my foot pedal or having the senile old lady from upstairs banging on our door, confusingly asking why we live in her apartment, or whatnot. It's also something I can do while watching my husband play a video game or something, because pulling a random strip out of a box and sewing it in a straight line to a piece of paper is really quite mindless. Before I know it, not even an hour has passed and I've got 4 or 5 completely pieced and pressed blocks sitting next to me. 

I just don't know how big I want this thing to be. Since the blocks are so easy to make, I'm inclined to keep making more, but I also can't decide on a layout. There's always the traditional string-quilt layout of little diamonds.

This layout covers about 95% of the walkable space on our bedroom floor. The quilt may end up being this wide, at least, because I won't be able to lay it out flat anywhere else without some major rearranging of furniture. Which, come to think of it, has never stopped me before. 

The diamonds are really defined in the picture, but I feel like in person, it looks like someone just threw up a bunch of random fabric strips on the floor. Then again, maybe that's just what happens when I crouch on the floor for half an hour, rearranging each block and noticing all the mistakes that seem to scream "AHAHA LOOK AT THIS BEGINNER" but aren't even perceptible once you get more than three inches away. Anyways, then there's the large diamond layout.

Some bad kitty came in and flipped up the bottom right corner block while I was turned around. I'm way too lazy to get back on my chair and take another picture with the corned flipped back down.

I like this layout too, but I also don't think I want a square quilt and I'll have to see what a single large diamond looks like as a rectangle (boy, this sentence would make my high school geometry teacher wince). I guess I'll just be playing around with layouts and making string blocks forever since I can't decide.